Professional Voice Talent, Amateur Actor and Knitter

Tag: knitting Page 1 of 3

Knitting for Me

What with all those WIPs* I finished for the Ravellenics, I found, when they were over, that I only had two long-term WIPs left. Both of these are projects I’ve been making for myself, and as often happens, they get put aside when I start something for other people and end up lingering. So, though I do have some projects to start for other people, I decided I’d treat myself and finish both of these first so I can wear them this winter, and enter them in this year’s County Fair.

I tackled the older of the two projects first. I started this vest in 2010! Poor thing. The pattern is called Elizabeth of York and it’s from Alice Starmore’s Tudor Roses book. I’m really pleased with how it turned out. As far as technique goes, it’s a very simple pattern; just knits and purls, some wrapped stitches and a single-stitch bobble. The challenge comes in keeping track of your place in the 36×48 chart, especially when you’re in the midst of a decrease section and your starting points keep changing. The pattern is for an open vest, but I prefer at least one or two closures, so I added a couple of clasps, which could be added as an afterthought and didn’t require me to change the pattern.

The second of the two projects is nowhere near as old as the first. I cast on in January of last year. It’s a pair of Norwegian-style mittens, with a Doctor Who theme. I’ve finished the first mitten and am about halfway through the second.

*WIP = work in progress

Ravellenics!

This year, for the first time, I participated in Ravelry’s Ravellenics games – a time for Ravelers to challenge themselves, which runs contiguously with the Olympic games. To make things more fun, the organizers set up events for us to participate in, such as the Hat Dash, the Cowl Jump and the WIPs Wrestling (WIP = work in progress, and in this case referred to projects started before the opening ceremonies).

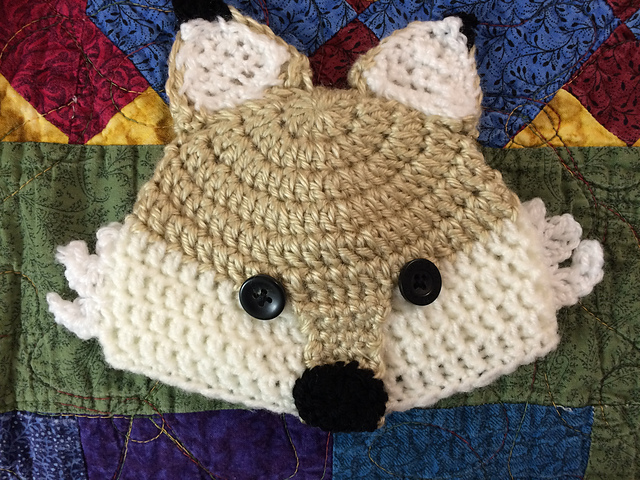
My first challenge to myself was to make something crocheted. I learned to crochet over ten years ago, made the center motif of a doily, and then beyond the occasional edging, never touched it again. So for my first project I made a crocheted baby hat.

I also made a knitted baby hat (my knitting group makes hats for newborns and preemies at one of the local hospitals). These were my two Hat Dash entries.

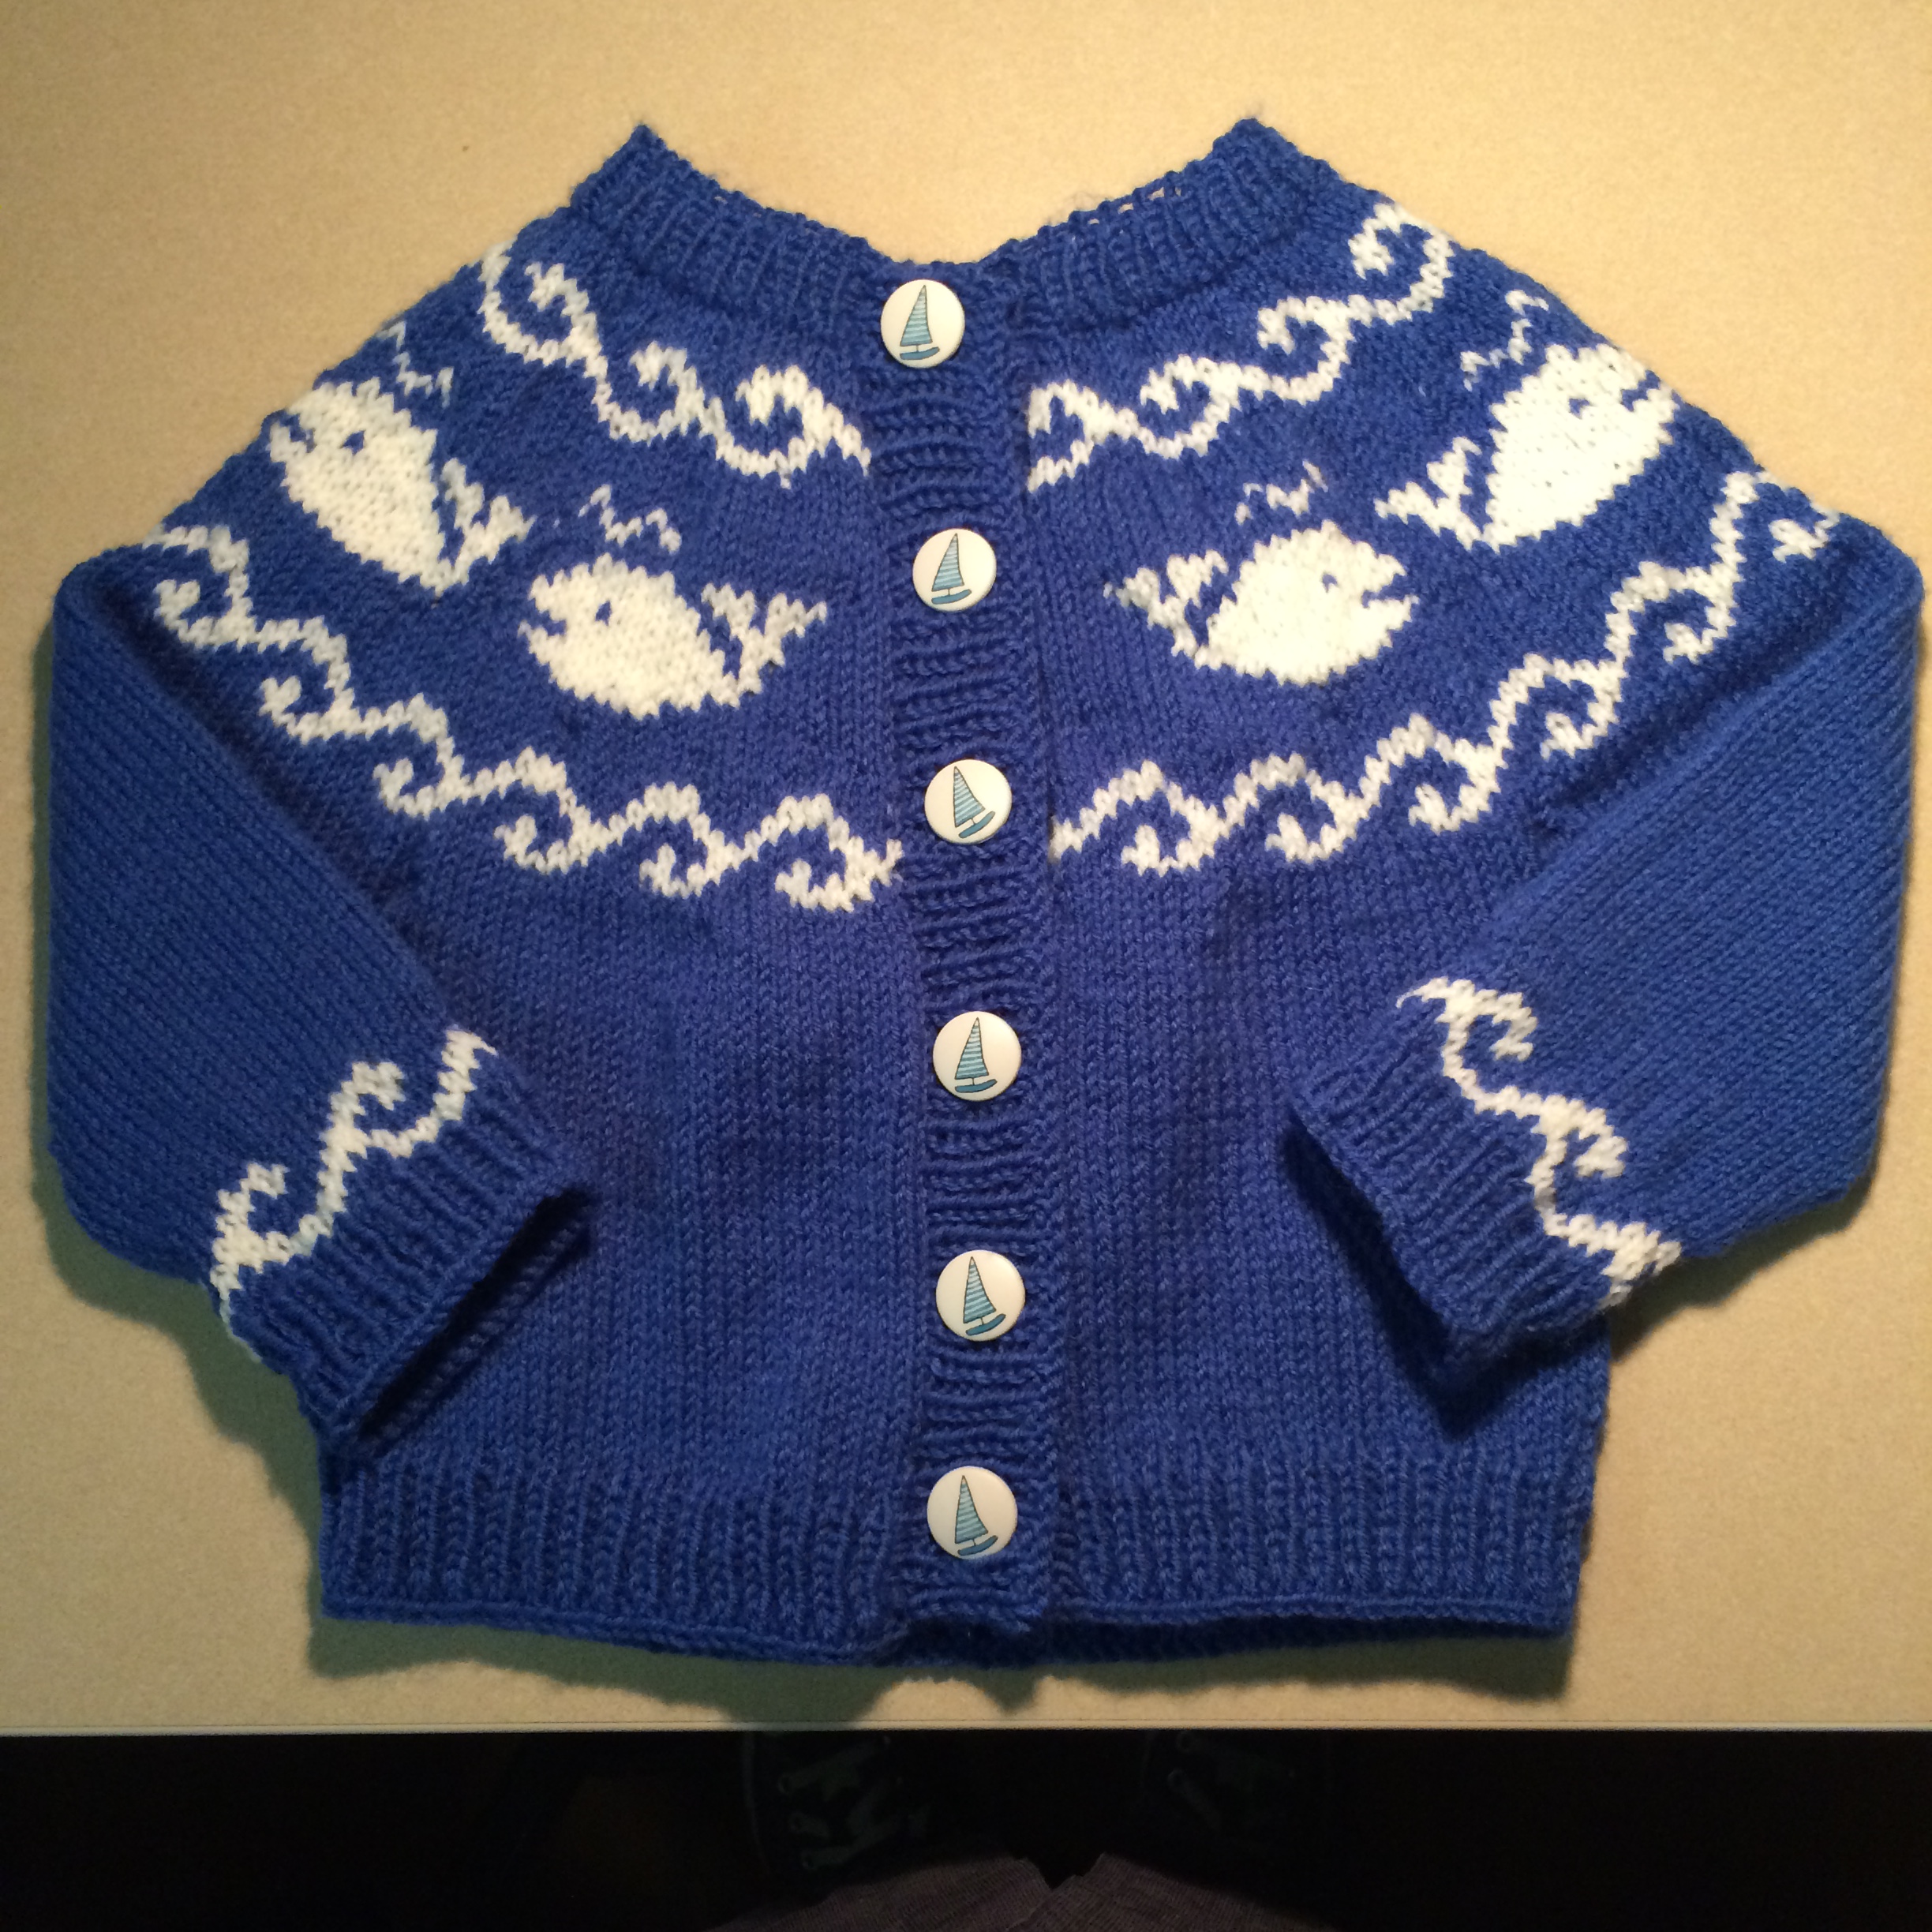
I had a baby sweater and a pair of socks that were about a third done, and two other projects that essentially just needed finishing touches. I entered all of those in WIPs Wrestling. (you may recognize those sweaters – I’m making toddler sized versions of some of the ones I made last year)

I also made a hedgehog for the Toy Toss:

And for my most ambitious project, a two-colour brioche cowl for the Cowl Jump. This was my first attempt at the brioche stitch and my second challenge to myself.

I didn’t watch much of the actual Olympics, beyond the opening ceremonies, but had lots of fun challenging myself with these projects.

Knitting thoughts

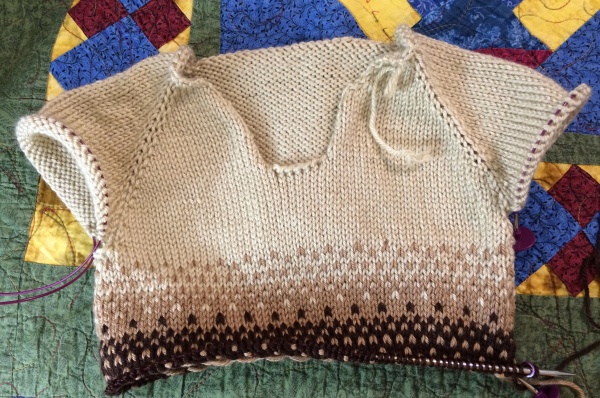
I’m working on a new baby sweater for a coworker who’s recently adopted a toddler. The pattern is called Metamorphic, and if you use three shades of the same colour, you get a cool ombre effect. I’m doing it in shades of brown.

Metamorphic Sweater

I’ve always known that I’m a tight knitter, but it was really driven home to me when I started this sweater. The pattern calls for DK weight yarn, but I could only find three shades of the same colour in worsted. For a normal knitter, this would mean that you’d have to go down a needle size to account for the thicker yarn, but when I started swatching, I found I needed to go up a needle size!

I’ve never been tempted to instagram my food, but it occurred to me this past week, watching a few friends at knitting circle trying to get good shots of their projects, that we look just like those food bloggers when we’re doing so. I have found myself perching on a step stool perched on a chair to get the height needed to photograph some of my larger projects.

Parental guilt trips

So about ten years ago I made this shawl. It was my first attempt at large scale lace, and I only made it because I wanted to try my hand at a big lace project. I don’t often wear shawls, and so it stays in my closet most of the time. About the only time it gets use is if I need such an item for a theatre costume. My mother has seen and admired the shawl for the last ten years, but shown no particular interest in it. Then last December I loaned the shawl to a friend to use as part of her costume in Miracle on 34th Street and a picture of it ended up on facebook. My aunt admired it and commented that she wished I’d make her one, so I said she could have this one. My mother’s reaction, “You could have offered it to me!” *sigh* Mothers. So now I’m making another, identical shawl for my mother, to keep the peace (I gave her the choice of taking the original one, and I’d make another for my aunt, or of getting something different. This was her choice.) At this point in its construction, it looks sort of like a mermaid’s tail.

Sweaterpalooza is over!

I’ve finished the last of the baby sweaters for friends who’ve been having babies this year! I have this half feeling that I should make one more, so it’ll be an even dozen, but there’s no way I’d get it done before the end of the year. 🙂

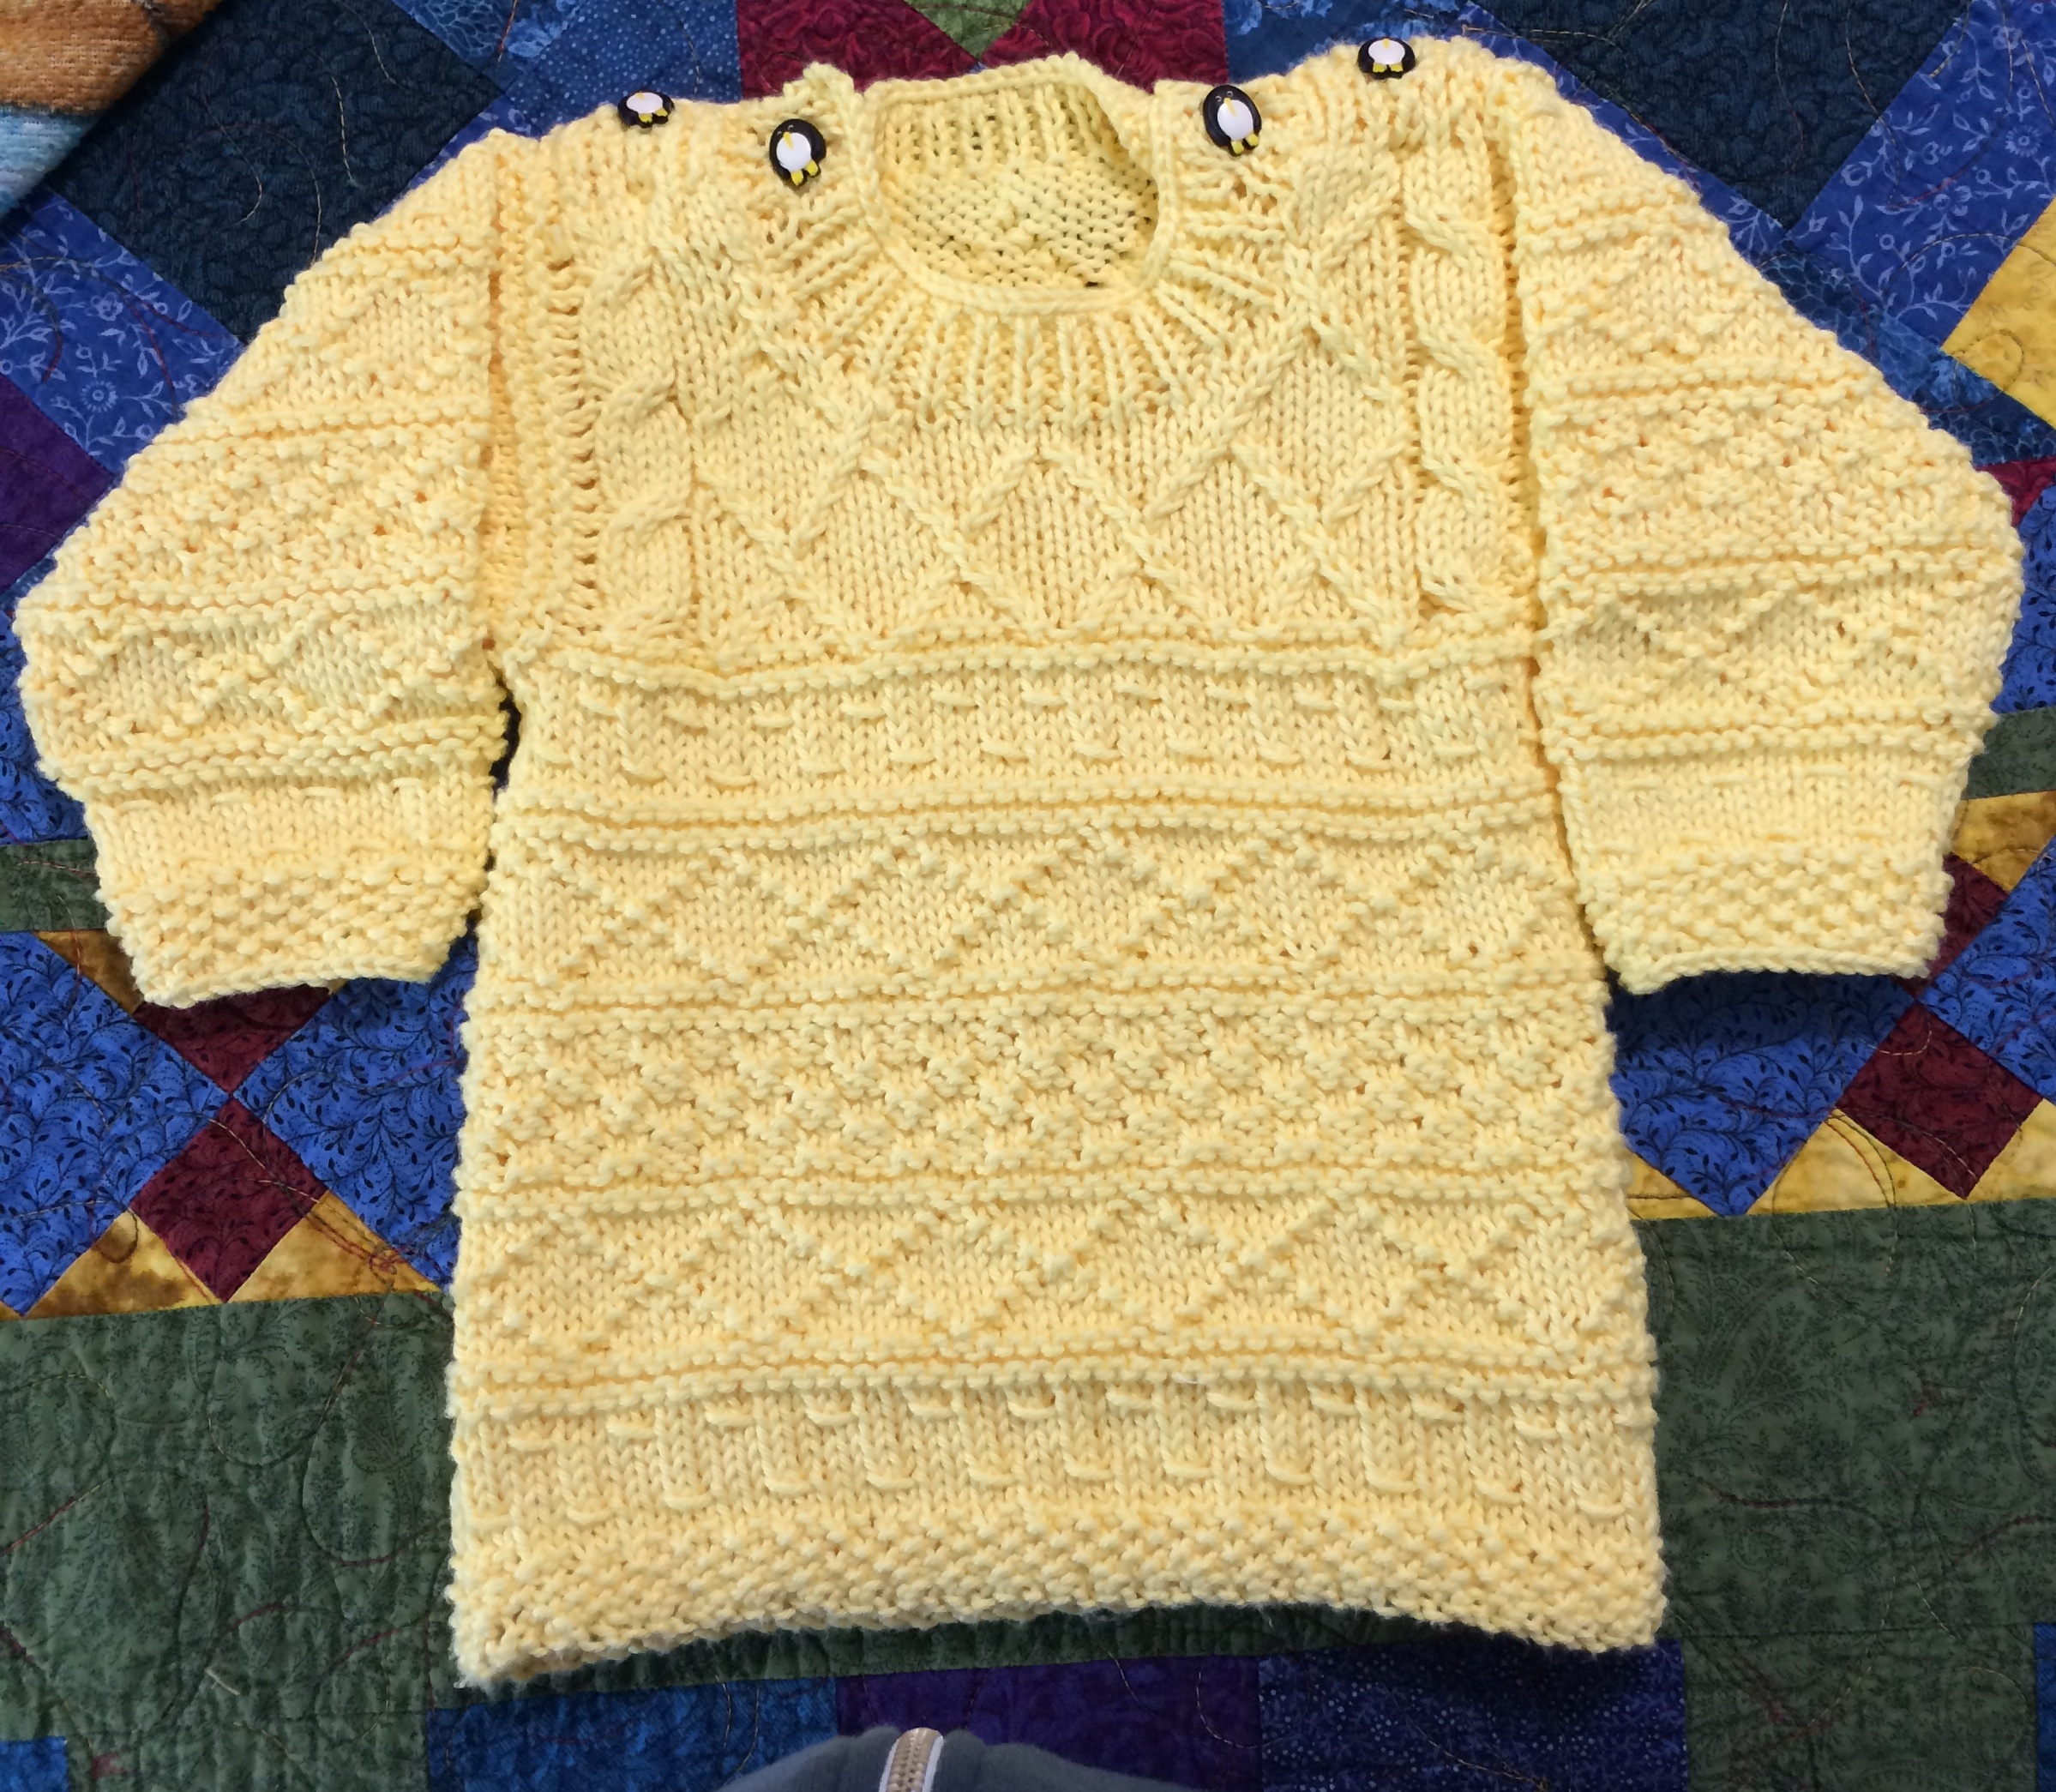
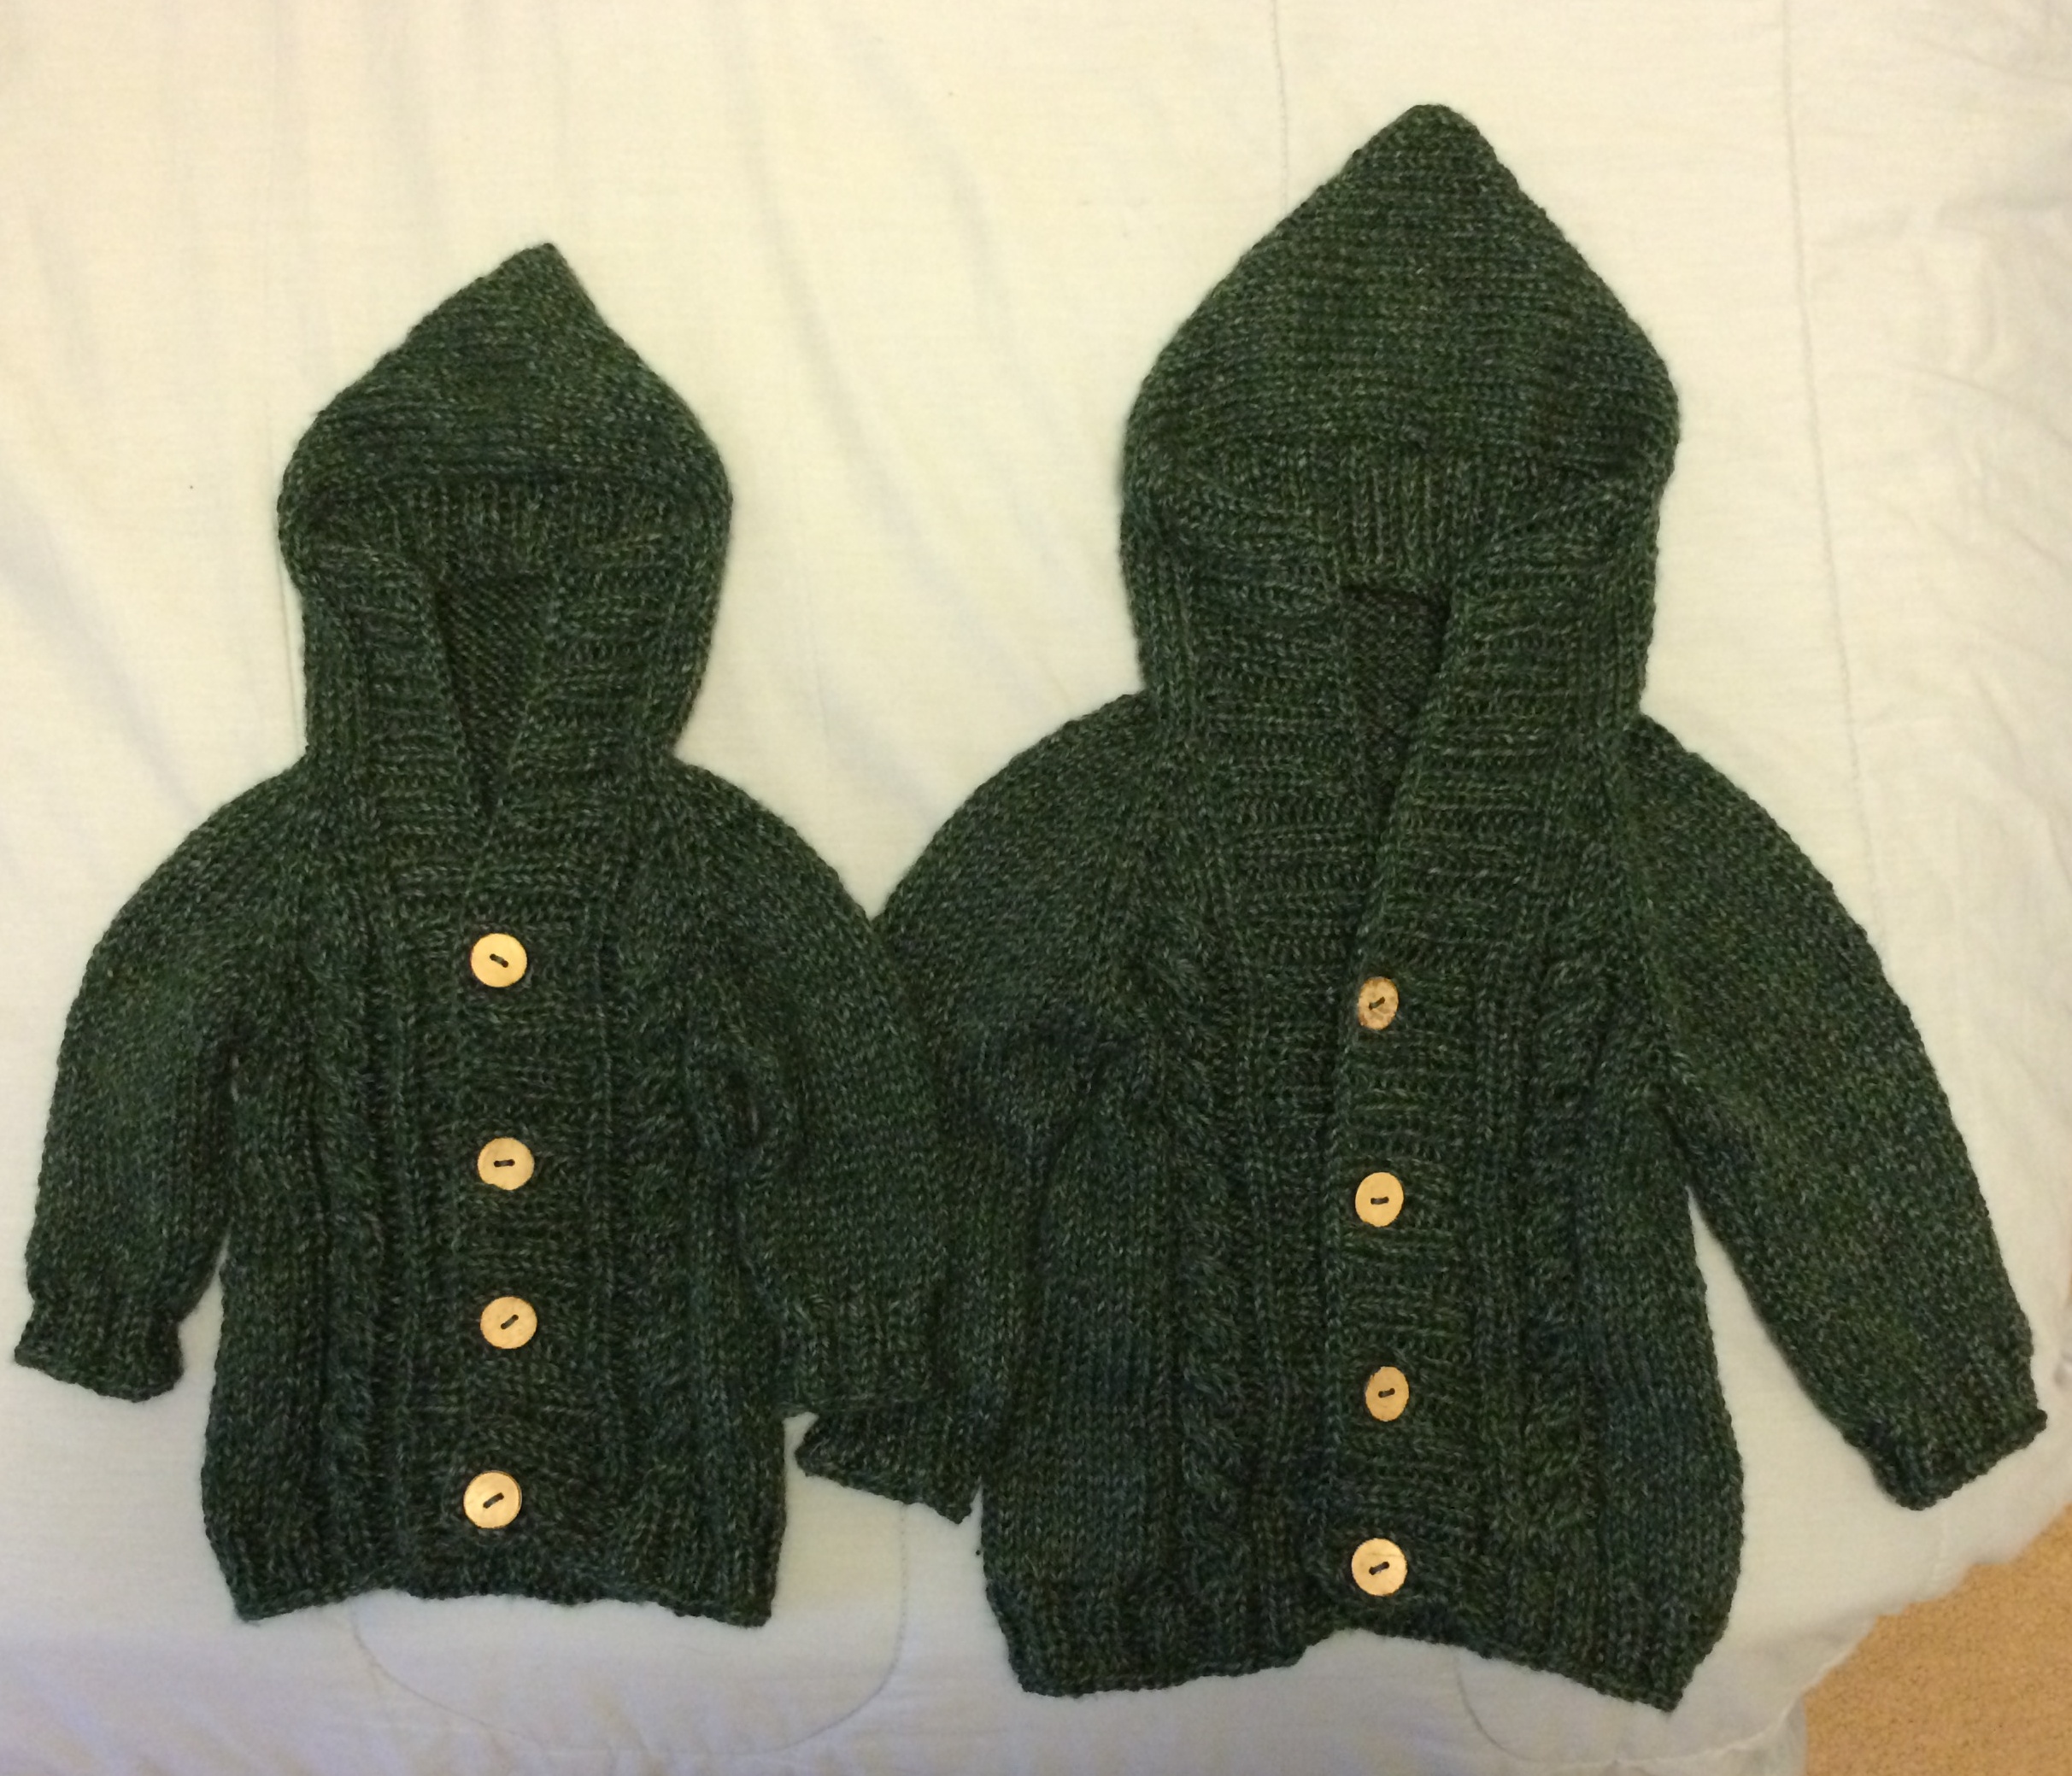
This pattern calls itself “Easy Aran”, but the only cabling is in the top section just below the collar. The rest of it is more of a guernsey (also known as gansey). For those who aren’t familiar, traditional Aran patterns (the knitting style that originated in the Aran Islands, which are part of Ireland), tend to incorporate lots of texture in the form of cables, where the stitches are worked out of order, in order to pull them in one direction or another, and form what look like plaits, or sometimes, diagonal lines of stitches. Guernsey patterns originated on the Channel island of Guernsey, and also incorporate texture, but tend to knit/purl patterns instead of cables. In both cases, these started as fisherman sweaters, and needed to be thick and warm. The texturing traps air, and depending on the stitch, can double the thickness of the fabric, making it warmer.

Twin Sweaters

Two more sweaters (nearly) in the bag! These two needed to be the same size as the previous three, since the two sets of babies were born around the same time, but I hadn’t marked down the size I used for the first three (6-9 month), and chose the wrong one (3-6 month) and ended up with a too-small sweater. So, technically, I have three more sweaters (nearly) in the bag, because I went ahead and finished the too-small one for the next person on the list.

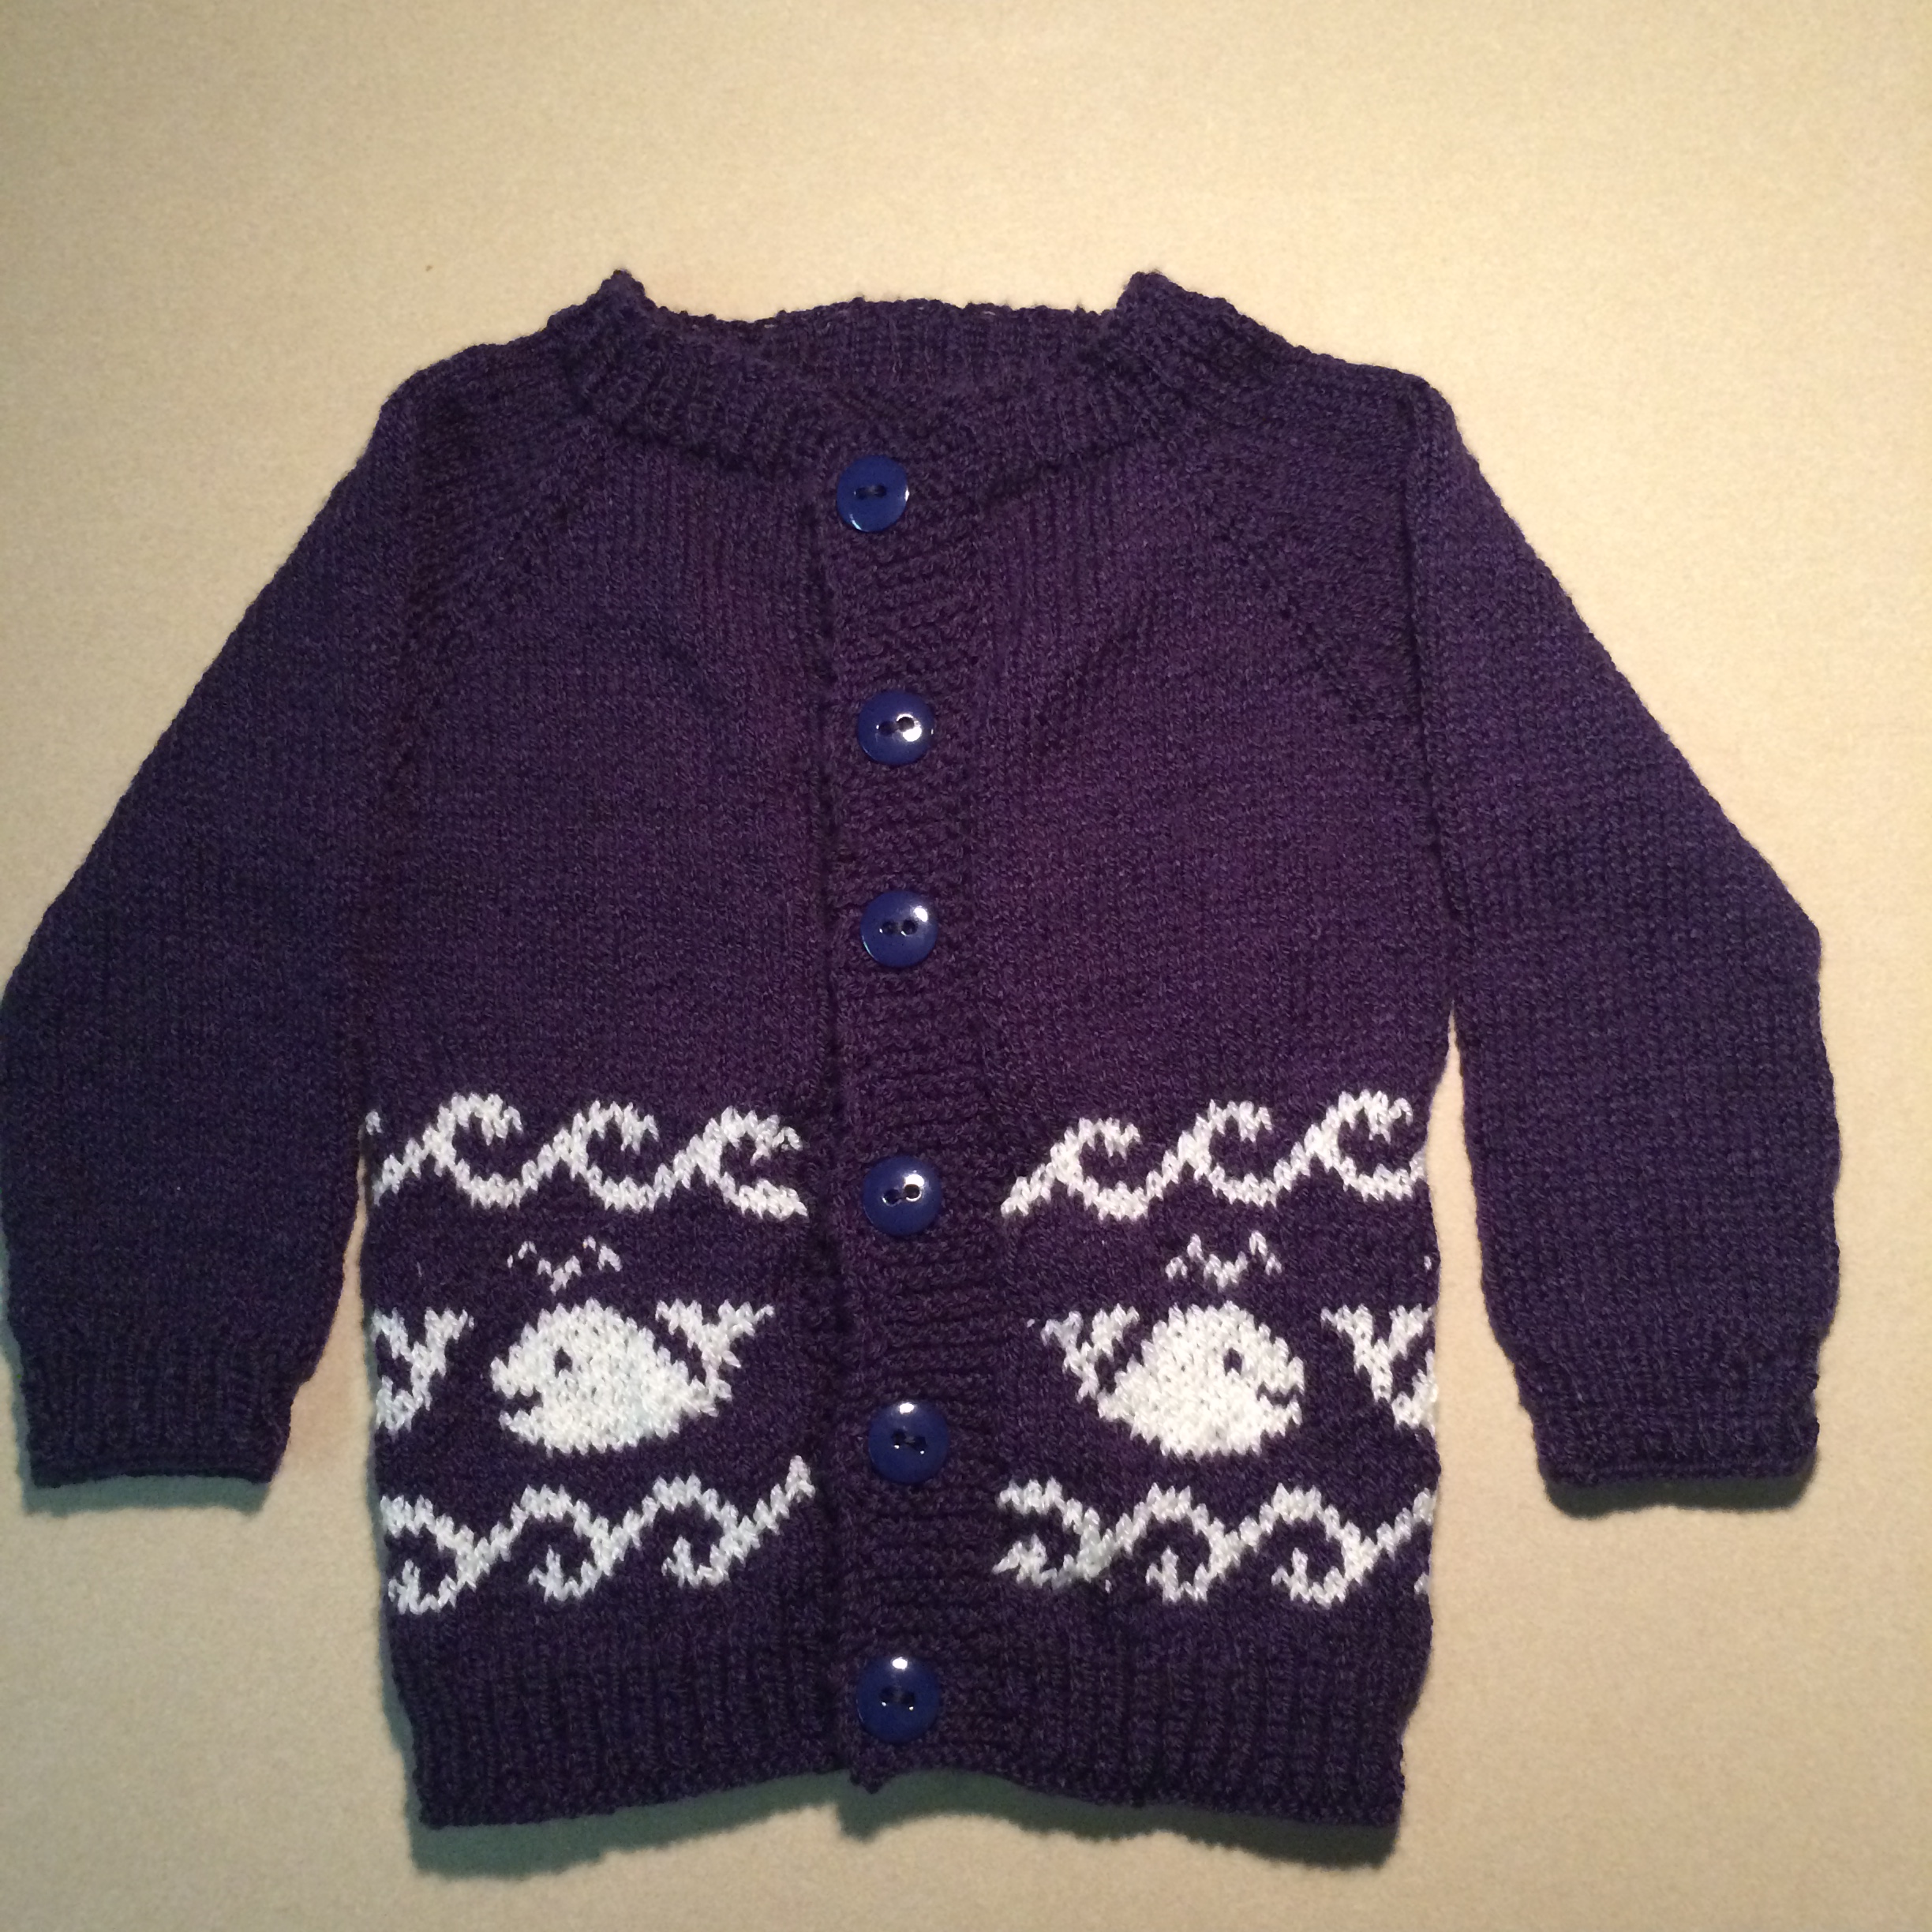
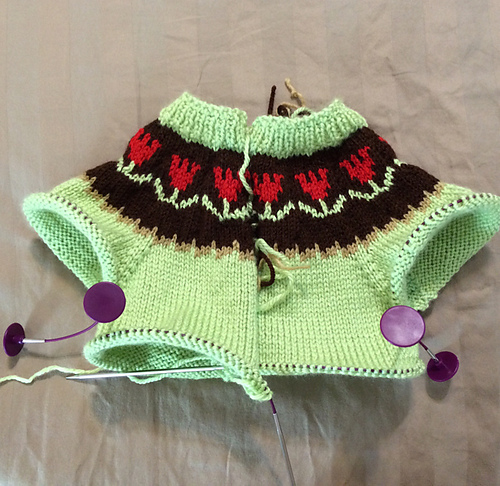
For my second attempt at the first twin sweater, and before I realized that the error I had made was choosing the wrong size, I decided to use the Tulip sweater from the last set as my base again, and just add the colourwork from the other sweater. I chose to put the colourwork on the yoke, however. I ended up liking this shade of blue better than the original too.

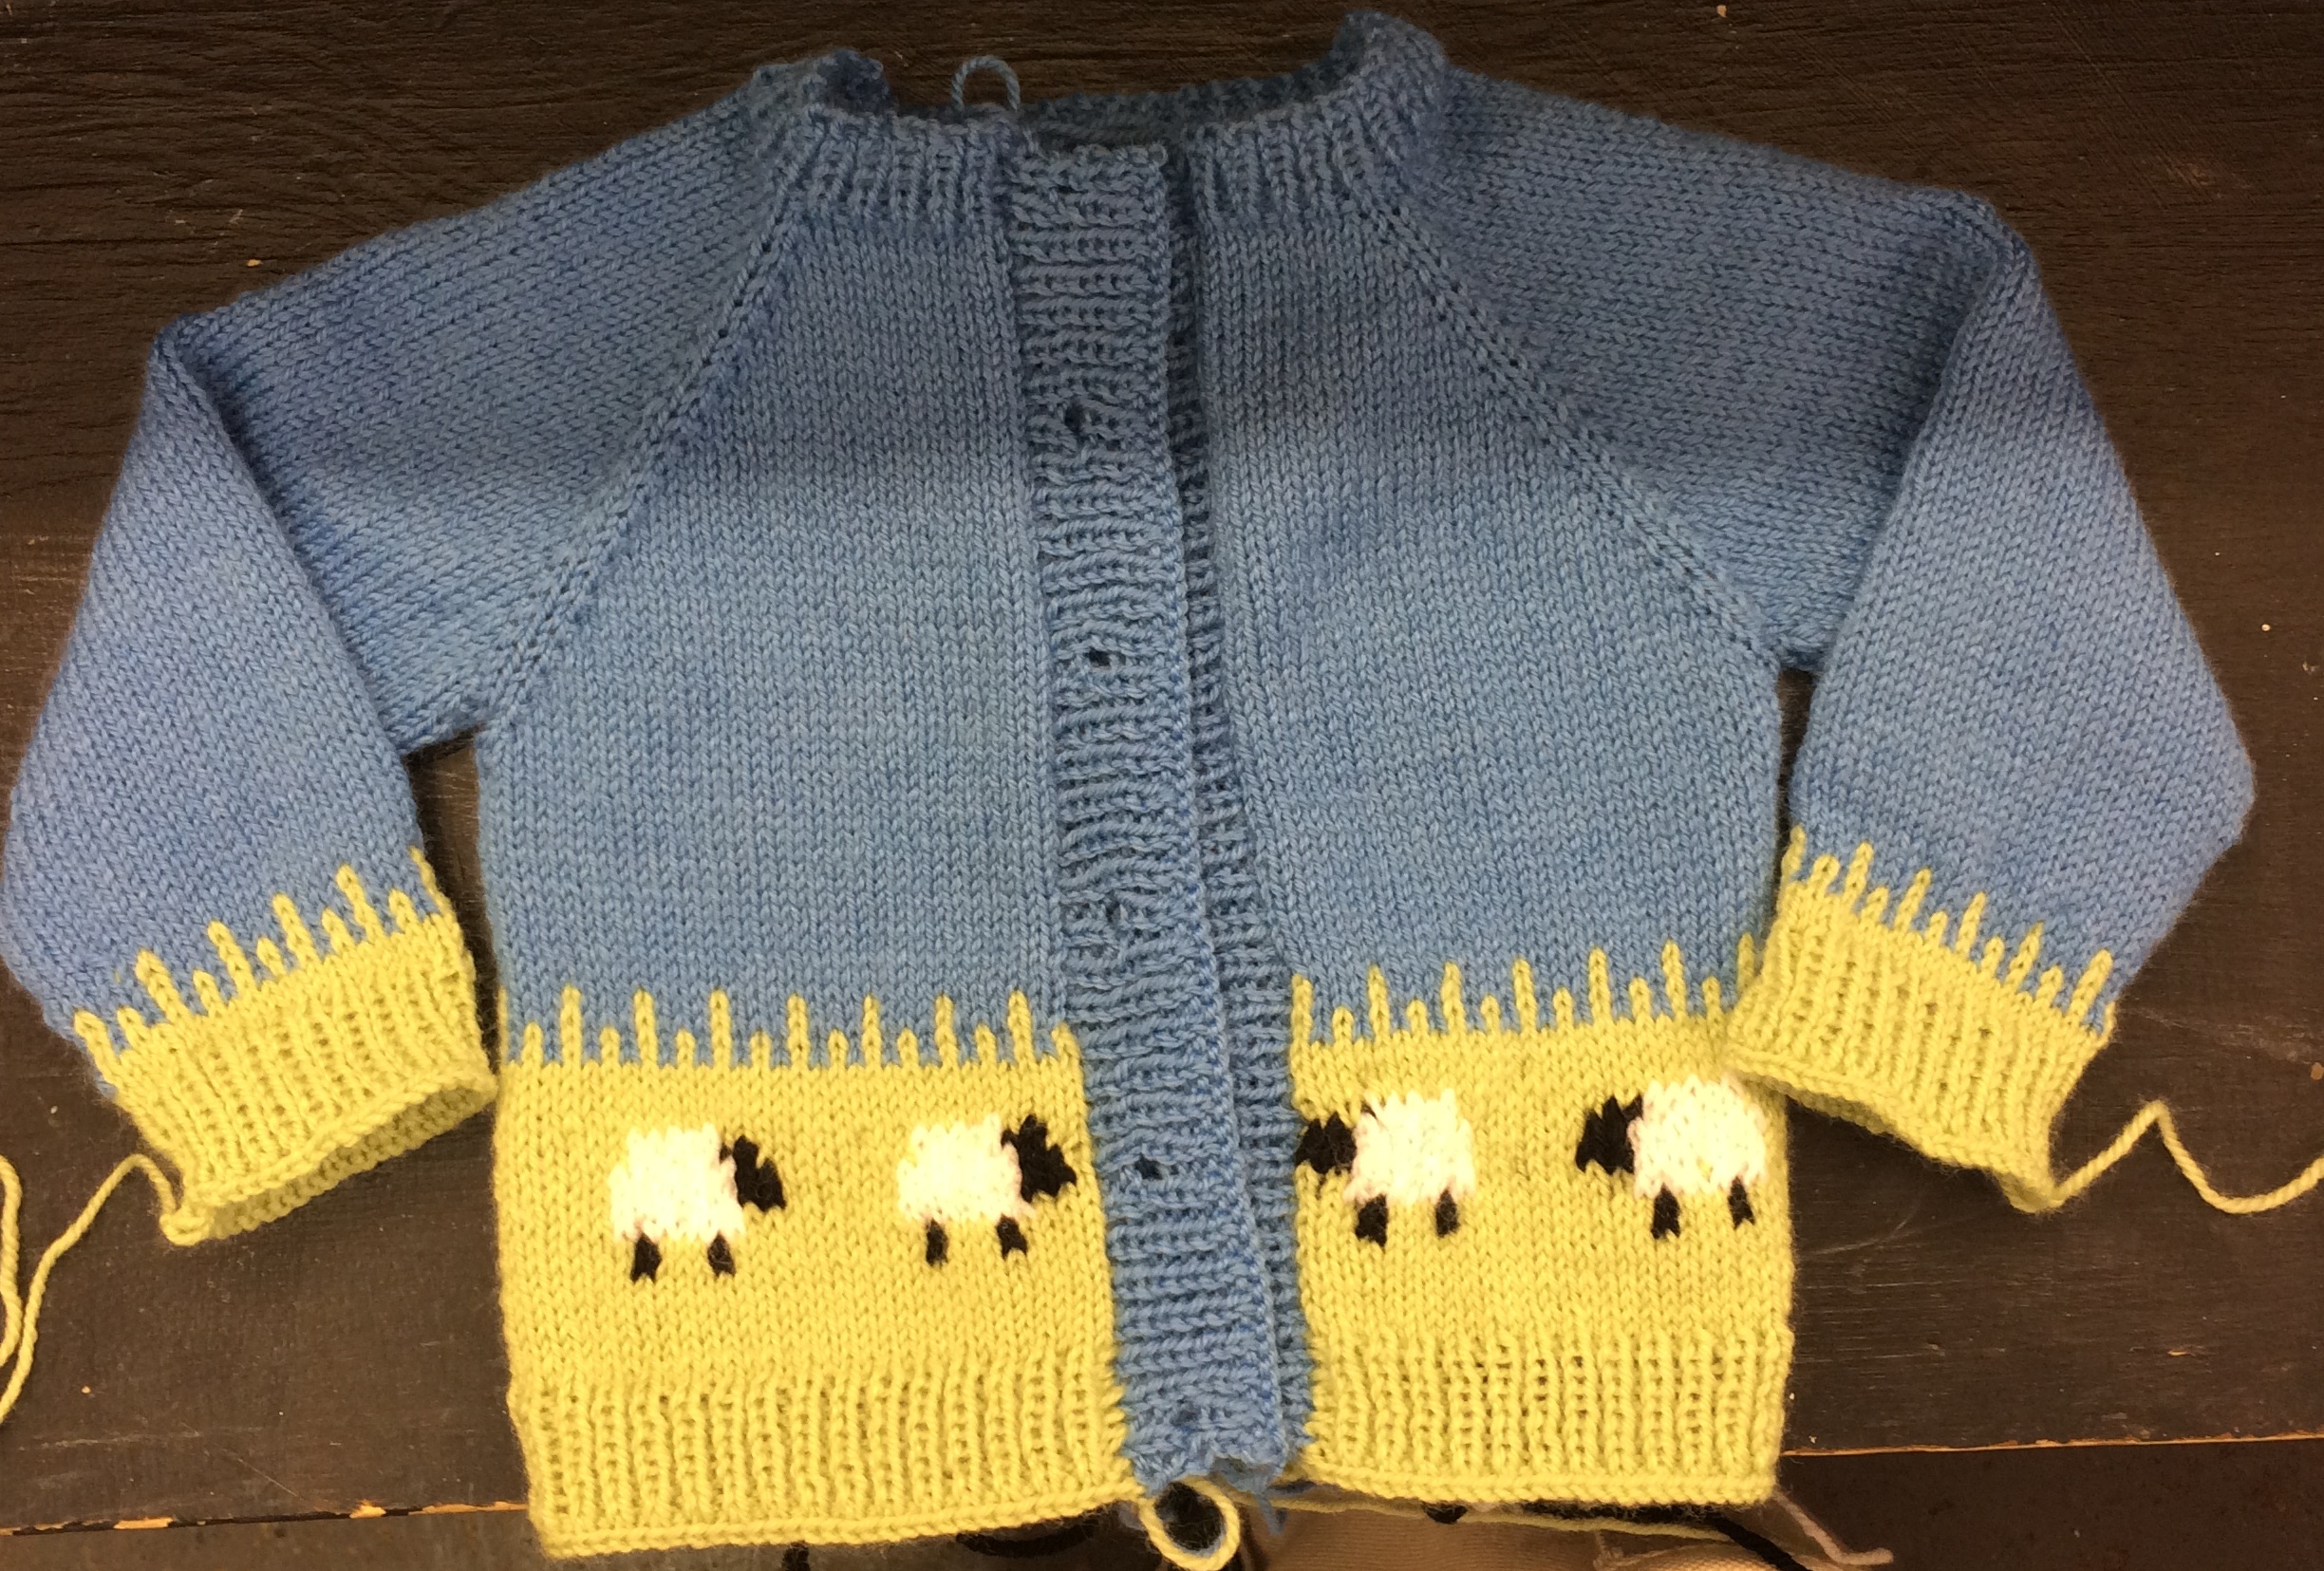
The second twin sweater also has the Tulip sweater as a base, and colourwork from a different pattern. This time, the original pattern had the colourwork on the yoke, and I decided to put it at the bottom of the body instead, because my brain is weird and doesn’t like doing things the easy way. This one still needs the ends woven in and the buttons sewn on (sheep buttons!).

I have one more baby sweater on my list, but I’m taking a break from baby clothes for a little while to knit a blouse for a co-worker. I’m uncertain who it’s for. Our first conversation led me to believe it was for her; the second that it was for her sister. They picked out the yarn and pattern together, but my co-worker never even started it. I get the sense that, when it came down to it, she was out of her depth, and so kept putting it off, to the point where her sister has stopped asking about it.

Triplet sweaters

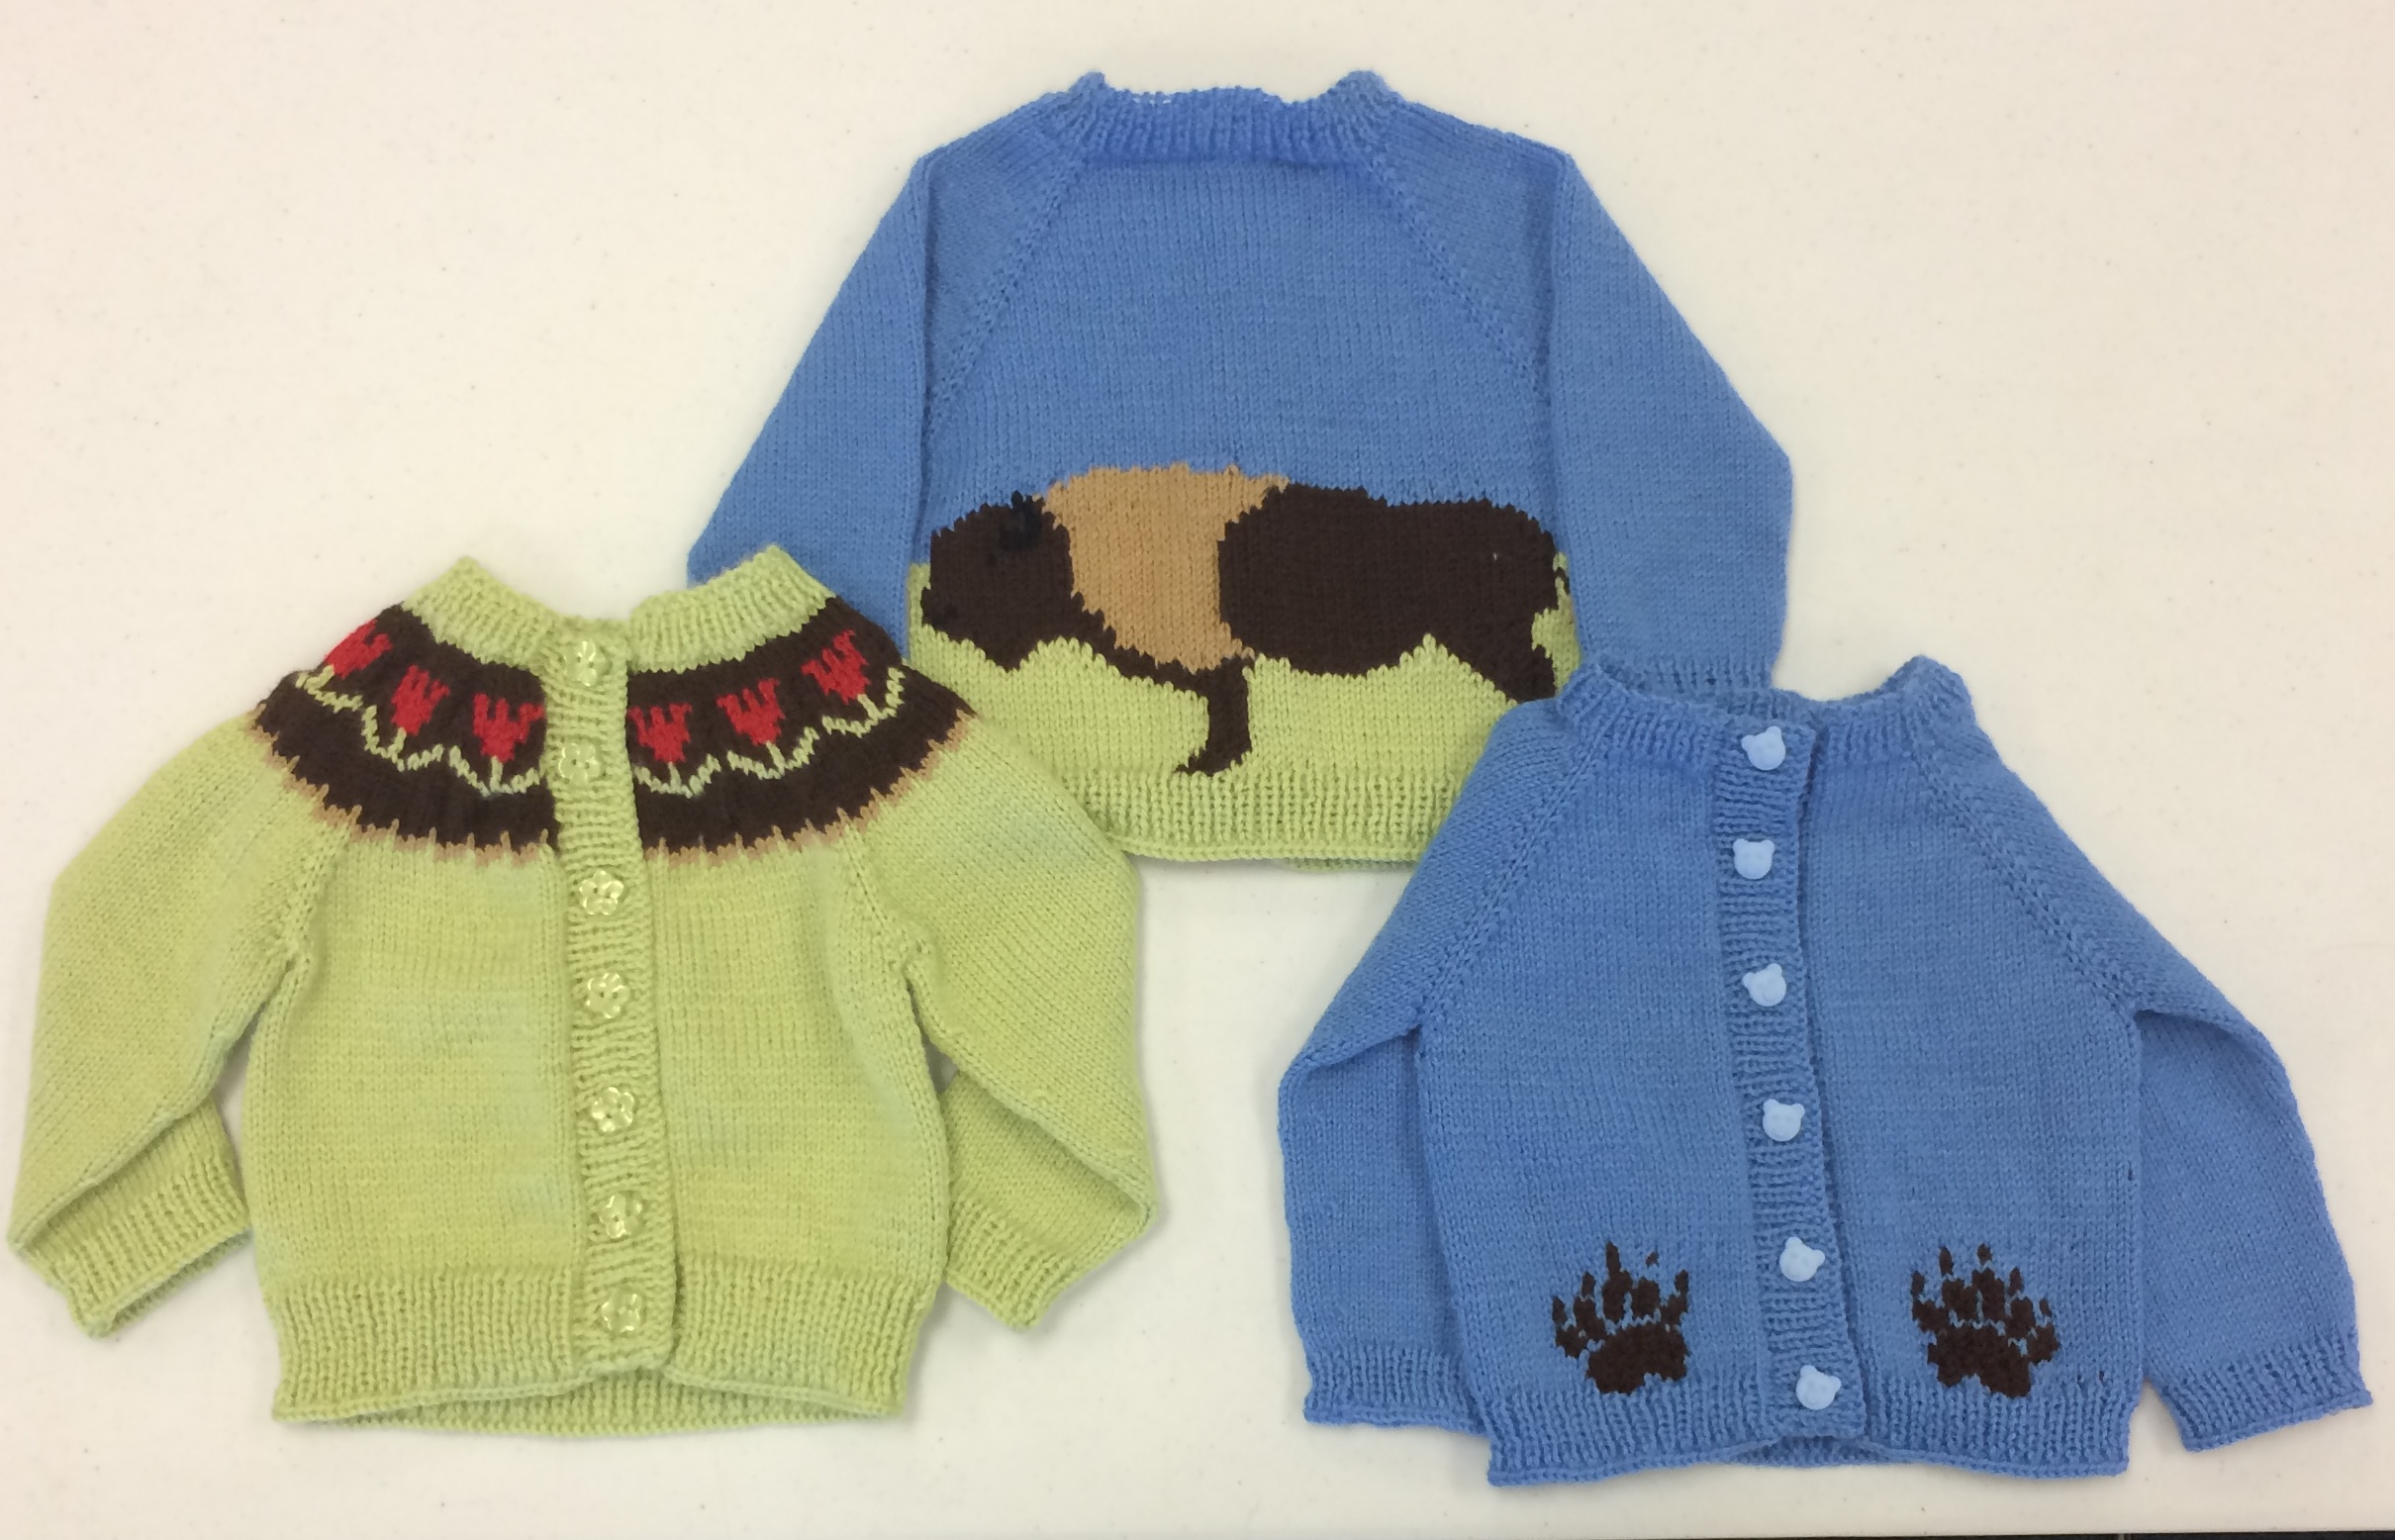
I’ve nearly finished the trio of sweaters for a set of triplets. They’re two boys and a girl, so I decided not to make identical sweaters. I started with the tulip yoke sweater in my previous post, and then used the same basic pattern but with different colourwork for the two boys’ sweaters.

Three baby sweaters

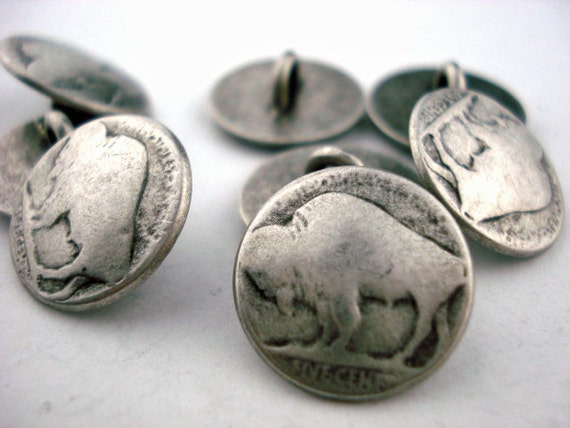
The paw print sweater has a bear on the back. I was able to find flower and bear buttons for the tulip and bear sweaters, but couldn’t find any buffalo buttons at the store, so I was making do with some random cute sheep buttons, until one of the ladies at the knitting circle mentioned that she had once used some buttons made from old buffalo nickels. The woman is brilliant. Look at these. Aren’t they just perfect?!?

Buffalo nickel buttons

I’m just waiting for them to arrive, and then this set will be completely done!

Next up, identical sweaters for identical twins.

Baby Bonanza

They must have put something in the water around here recently, because I’ve got eleven (yes, 11!) baby sweaters in the works! Granted, two of them are for older siblings of new babies, but that still means nine new babies among my friends. Yikes!

I started with the two paired sweaters; the same two patterns in two different sizes. Hopefully, come winter, they’ll both be able to fit in their sweater at the same time, so they’ll match and be adorable.

First pair.

Second pair (the second sweater in this pair still needs the ends woven in and the buttons added).

And now I’m working on the first of three sweaters for a set of triplets.

Self-striped socks

So, a few months ago, I posted about using Magic Loop to knit a pair of items at the same time. My test case was a pair of mittens.

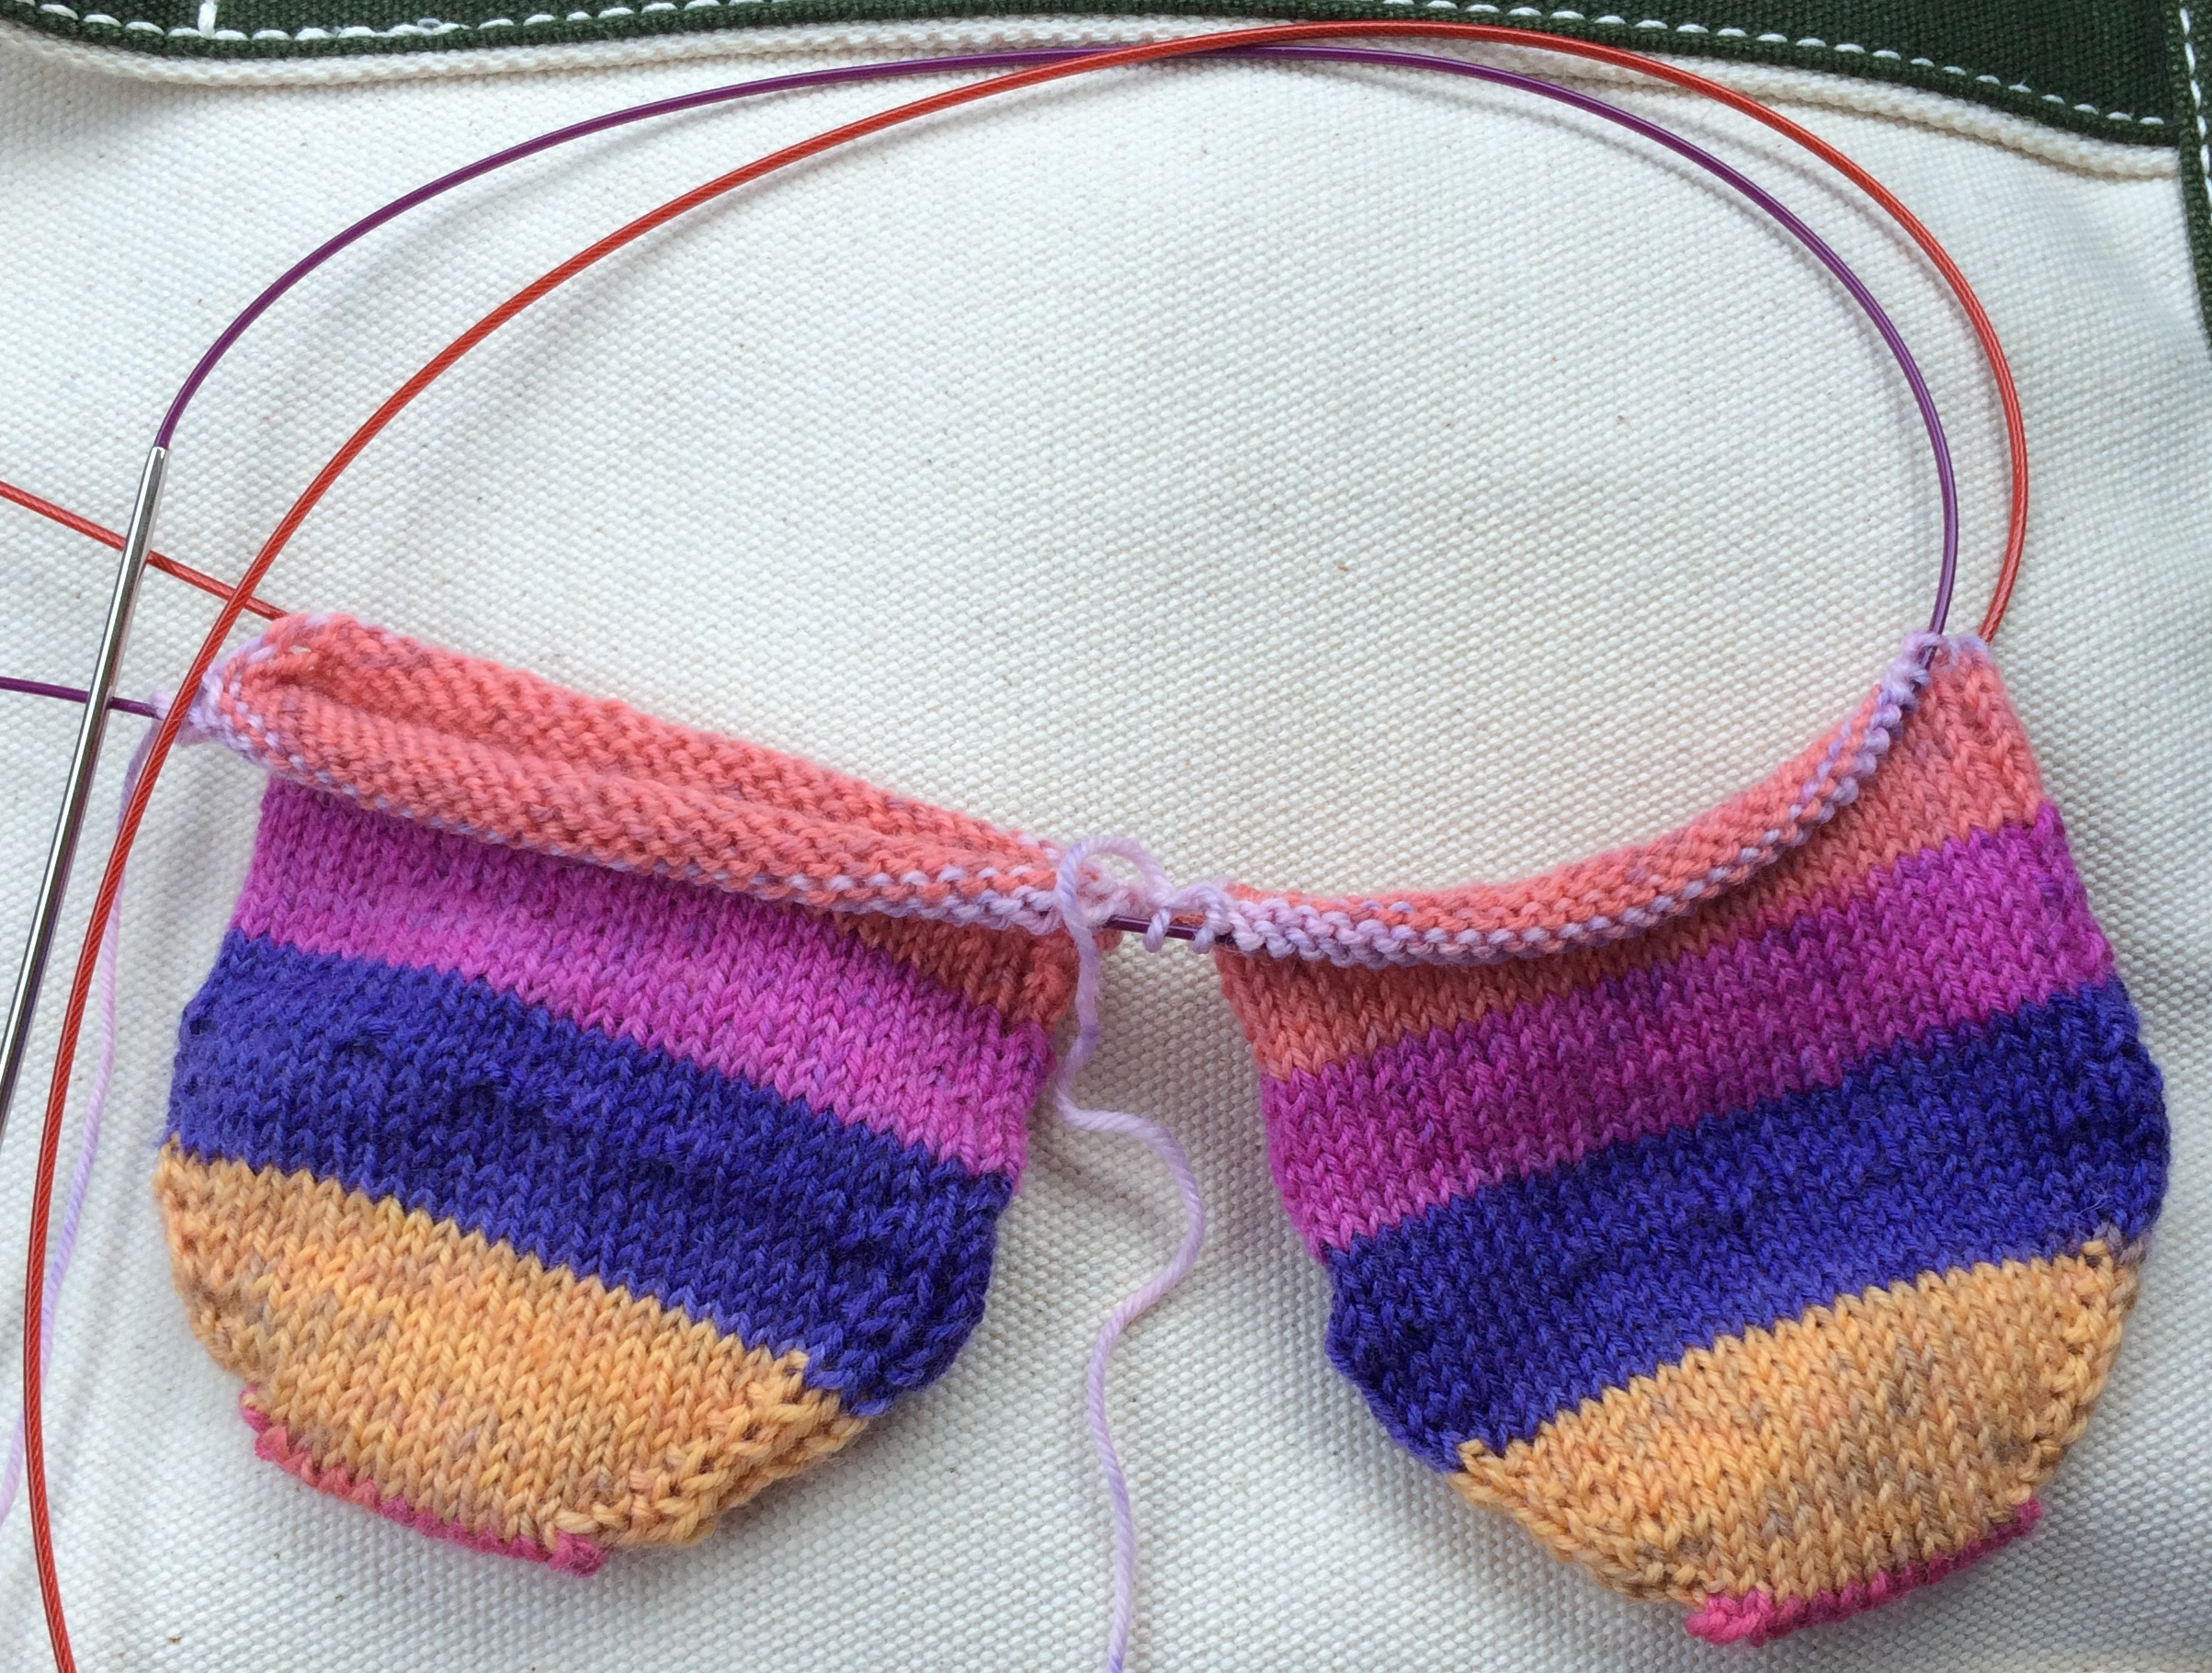
The organizer of my knitting and crochet group asks members to demo various techniques or crafts at our meetings, and a few weeks after I finished the mittens, the demo was knitting in the round on two circulars. Well, I’m perfectly happy with Magic Loop knitting, but I did find it a bit tangly, when knitting the mittens – since I was doing stripes, I was having to juggle four strands of yarn – so for my next pair project (socks, this time), I decided to give the two-circulars method a try. I have to say, I really like it. I’m not going to give up Magic Loop, but for knitting two at a time, I much prefer the two-circulars method.

Pro-tip: It really helps to have a pair of needles that are not identical, either different coloured tips, or different coloured cables, because you are supposed to knit from one end of one of the needles to the other end of the same one, and if you have identical circulars, it’s way too easy to get confused and accidentally knit onto the wrong needle.

Here are my socks in progress. Notice that one of my cables is purple and the other is red; nicely contrasting.
Self-striped Socks

Knitting Cast-ons

I’m demoing a variety of knitted cast ons at this week’s Knitting Circle. This is a collection of resources to refer back to.

Regular Cast Ons

Knitted Cast On
As its name implies, this cast on is based on the basic Knit stitch. Start with a slip knot on your left needle. Insert your right needle into the slip knot and work a knit stitch, but instead of slipping the worked stitch onto your right needle, place it back on your left needle. You now have two stitches, and your needle is set to work another.
Demo with video and pictures

Cable Cast On
This is similar to the knitted cast on. Begin the same way, until you have two stitches on your left needle, but then insert your needle between the first and second stitches and work as if it were a knit stitch, slipping the new stitches onto the left needle as with the knitted cast on.
Demo with pictures

Long-tail Cast On
Start with a slip knot on one of your needles, which you hold in your right hand. Loop the yarn over your thumb and forefinger, with the tail end over your thumb, and anchoring both ends of the yarn in your fist. Bring the needle tip up into the center under the strand of yarn that runs from your thumb to your fist, over the strand on your index finger, and through the loop this has created over your thumb. Release the loop of yarn and tighten your new stitch.
Demo with pictures

Backwards Loop Cast On
Start with a slip knot on one of your needles. Pick up a loop of yarn and twist it, then place it on your needle, making sure the tail is trapped between the outside of the loop and the slip knot.
When knitting your first row of stitches after casting on with this method, you will feel that you have done something wrong, because the cast on loops will suddenly feel very loose. This is normal with this technique. Don’t panic!
Demo with video and pictures

Jeny’s Stretchy Slip Knot Cast On
This is the stretchiest cast on I know of. It is just a series of slip knots. Caveats for this method:

  • Works best with a smooth yarn. Fuzzy or bumpy yarns will not want to tighten properly.
  • You must be careful to hold the beginning of each slip knot right up against the previous one, because it is a knot, and once it has been tightened, you will not be able to snug it up.
  • Hold the bottom of each slip knot as you tighten, otherwise you will end up with a twisted line of stitches.

Creator’s website with link to demo video

Provisional Cast Ons

A provisional cast on creates a line of live stitches that can be worked in either direction. You will usually work in one direction, then return to your cast on, pick up the stitches being held on your spare yarn, and continue in the opposite direction.

Long-tail-style Provisional Cast On
Take a strand of yarn of a similar weight to your working yarn (it is best to use a smooth yarn of contrasting colour) and tie the two yarns together. Anchor the knot against the needle in your right hand, and loop the two yarns over the thumb and forefinger of your left hand, with the working yarn over your thumb and anchoring the ends in your fist. Rest your needle between the two threads, and from that position, bring it down and under the working strand, then up and over the provisional strand and under the working strand again, down through the center and up along the index finger side. This will create two stitches. If you have a nice, flexible cable needle, you can use that instead of the waste yarn. The advantage is that it’s easier to pick up the stitches from the cable needle than from the waste yarn. Even better, if your cable needle is of the same size as your working needle (or you have a set of interchangeable needles), you’ll just be able to start working from that needle without having to pick up stitches at all!
Demo with video

Crochet Provisional Cast On
Using a scrap of spare yarn (preferably a smooth yarn in a contrasting colour to your working yarn) crochet a chain that is ten or fifteen stitches longer than you need to cast on. Turn the chain over so that the bumps on the rear of the stitches are visible. Starting a few stitches from the end, pick up and knit the number of stitches you need into consecutive crochet bumps.
Video demo

This is just a bare sampling of the different types of cast ons available. A quick google search will reveal that there are literally dozens of different cast ons and variations on cast ons. We will always have a favourite go-to cast on, but it’s good to be passingly familiar with other methods, which might work better for a given project.

Some other online resources
Keep On Knitting Blog
Cast Ons Page on KnittingHelp.com
Knitting At Large’s Catalog of Cast Ons

Page 1 of 3

Powered by WordPress & Theme by Anders Norén